

Popular life hack websites have sprung up giving you all the best tips to clean everything at home. From using baking soda to unclog sinks to the use of soft drinks to make aluminum shiny again.
We’ve scoured the internet for the best cleaning tips and tested them all out at home. In this post, we’re going to give you 50 of the best that we found so you can have your home at its best look before the holidays begin.
Yard and Garage
Quick Navi -
- Yard and Garage
- 1. For a manicured-looking yard, make sure to re-edge the borders of the beds.
- 2. For everyday maintenance, remove dead plants and leaves in the bed.
- 3. Prune your plants.
- 4. Remove old mulch and replace it with a new one.
- 5. Stake your plants!
- 6. Use a trisodium phosphate to clean paint and other stains on your garage floor.
- 7. If the budget allows, apply epoxy flooring.
- 8. Start on a small area in your garage and work towards cleaning up the whole area.
- 9. Save some space when organizing, buy a peg board to easily hang things for quick access.
- 10. During your clean up, have three boxes ready: For donation, for keeps, for throwing away.
- Ceiling
- 11. Before anything else, make sure to remove all the dust from your ceiling.
- 12. Place old towels or old shirts on the floor before you start applying your wet cleaning agents.
- 13. Use a sponge to apply wet cleaning agents.
- 14. Use an old toothbrush to clean smaller spaces.
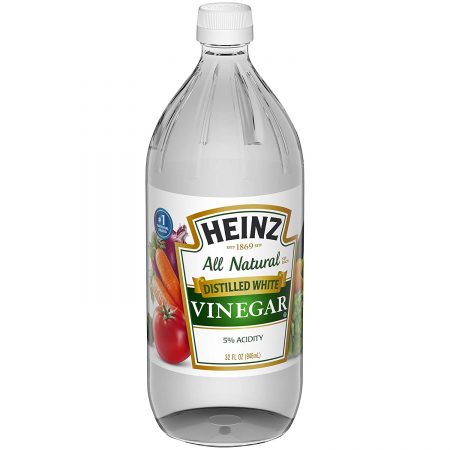
- 15. If you don’t want to use highly toxic materials in your clean up, use vinegar.
- Windows
- 16. Weather matters. A little cloudy day is a great time to clean out windows.
- 17. Dust off the area you wish to clean.
- 18. Make a glass clearing solution with vinegar!
- 19. Use a little bit oil to clear off sticky adhesives and clay from the window.
- 20. Use two different scrubbers or squeegees–one for the outer part of the window and one for the inner part.
- 21. If you don’t have a squeegee or a microfibre to clear off the water from the glass, you can use newspaper!
- 22. Always us a fresh scraper if you’re going to clean hard-to-remove materials off your window.
- Furniture
- 23. Know what kind of material your furniture is and use the appropriate cleaning agent.
- 24. Wipe upholstered furniture with a soapy mixture of liquid detergent and a sponge.
- 25. Vacuum leather and upholstered furniture weekly to prevent dust build up.
- 26. Wipe wooden furniture with delicate cloths, such as a microfiber to prevent scratches.
- Floor
- 27. Make your dustpan an actual dust magnet!
- 28. Use a rubber glove to wipe hard-to-reach dusty areas.
- 29. Smelly vacuum? Time to bring out the detergent crystals!
- 30. Clear hair from your vacuum.
- 32. Got carpeted flooring? Sprinkle some baking soda to instantly lift some of the smells.
- 33. Re-purpose old socks as a sweeper.
- 34. Apply some Club Soda on some floor stains to make it go away!
- Kitchen
- 35. Have a grease-free floor with a baking soda and vinegar solution.
- 36. Kitchen tiles looking a little grimy? Create a lemon and hydrogen peroxide solution to bring out the grout!
- 37. Oily kitchen cabinets? Safely clean them with a hydrogen peroxide and baking soda solution.
- 38. Revive your baking sheets with a hydrogen peroxide and baking soda solution.
- 39. Clean your oven with ammonia and dish washing soap.
- 40. Dirty cutting boards? Clean it with a lemon slice!
- 45. Safely remove nasty fridge smell by keeping pieces of charcoal inside.
- 46. Easily lift stubborn oil and dust from your range hood with boiled water and baking soda.
- Bathroom
Let’s start this post with the outdoors–your yard and garage.
These two locations at home are what people often notice first and should not be ignored when doing clean up duties.
1. For a manicured-looking yard, make sure to re-edge the borders of the beds.
This gives your landscape a clean look even though it’s not spring yet.
2. For everyday maintenance, remove dead plants and leaves in the bed.
Once you have removed all of the dead plants and leaves, you can recycle these and put them in compost that work great by acting as a natural fertilizer for your garden.
3. Prune your plants.
By definition, pruning is the act of cautiously cutting away several parts of the plants. If you have perennials in your yard or landscape, be sure to prune your plants. This will make sure that plants such as shrubs will grow in the direction that you want it to grow.
Also, when you prune your plants, make sure to only prune or “trim” about 20% of the plant and not go too much! Sadly, according to research, excessive pruning can cause your shrubs to have a stunted growth because of the over-stress to regrow all the parts that they lost.
4. Remove old mulch and replace it with a new one.
The mulch is a combination of dead twigs, branches, leaves, and other composting organic materials that is placed right around the plants in order to nourish it.
Gardens with old mulch just appears like they were left out. Newly-mulched landscapes and gardens are very pleasant to see. It gives the impression that the garden is well cared for and that the owners are paying attention to the health of their plants because they continuously nourish it.
5. Stake your plants!
- Staking Large Indeterminate Tomatoes: A 3 Stake Method. Screenshot from The Rusted Garden on Youtube
Do not stake it like how you would a vampire! Staking is a process by sticking a stake beside your growing plant. This process is usually done to herbaceous plants such as a tomato,but, staking other kinds of plants can benefit from this process as well. Not only will your plants benefit, your garden won’t look like a shrubby mess of wild growths.
Trust us, you’ll want to do this to your growing plants.
6. Use a trisodium phosphate to clean paint and other stains on your garage floor.
The garage is one of the areas easily left out. After all, it’s not an area where you will receive guests or lounge after a tiring day. Even so, a clean garage is just as important as a clean living room. Having a cleanly maintained garage will keep rodents and other animals away from it.
One of the areas in the garage that will require a little bit of elbow grease to clean is the floor.
A cement without epoxy flooring is a little bit hard to clean. Grease trapped in the littlest creases can be very tough. To get this job done, you might need the help of a chemical, one of which is, trisodium phosphate.
Trisodium phosphate or TSP is a very powerful stain remover and thus, before using it, you must have protective covering for your face and hands.
To use TSP as a stain remover, you have to get water, a small bucket, and of course the TSP powder.
- Step 1: In the small bucket, put about 30 grams or 1 ounce of the TSP powder.
- Step 2: Pour in one cup of water and one cup of absorbents.
- Step 3: Mix the ingredients until a paste is formed.
- Step 4: Scoop out the mixture and apply on to the stain. Make sure that the mixture is about 3/8 inches in thickness.
- Step 5: Let this mixture sit and work for 24 hours. Letting the mixture sit for 24 hours will ensure that oil is drawn out of the concrete and absorbed by the TSP and the chemical absorbent.
- Step 6: Once the time has lapsed, you can scrape off the dried up mixture, reuse it or properly dispose it.
- Step 7: Scrub off the area with a nylon/plastic brush and water as you normally would.
- Step 8: Rinse off with water.
- Step 9: Repeat as necessary.
Clearing stains off concrete can take about two or three applications of this TSP mixture. So be sure to keep the died up mixture for the next use.
7. If the budget allows, apply epoxy flooring.
- Garage floor coated with epoxy paint will make it easier to clean.
Now, this cleaning tip is a little on the expensive side. It’s actually more of a renovation than a “cleaning & maintenance” tip.
Investing on epoxy flooring is one of the best cleaning and maintenance investment that you’re going to put in your home. Among the reasons why you should apply epoxy flooring on your garage is how low maintenance it will become. Grease and oil will be easily wiped off and dust won’t build up. Just wipe off your epoxy coated floor with a wet mop and you’re done! How easy is that!
If you want to apply epoxy flooring by yourself, we found a reddit thread that has all the best recommendations on how to DIY epoxy flooring application like a boss.
8. Start on a small area in your garage and work towards cleaning up the whole area.
9. Save some space when organizing, buy a peg board to easily hang things for quick access.
Not only is a peg board a space saving idea, it limits the feeling of having to box everything back after you used a tool. With a peg board, you can easily access your tools that you often use be it a brush, the screw driver, some cords, a wire strip, whatever it may be that you would often need!
10. During your clean up, have three boxes ready: For donation, for keeps, for throwing away.
Let’s admit it, we’ve all kept items in our garage mindlessly or just decided to put it there for “future use”. Sometimes, these things don’t get sunlight even though it is for “future use”.
When cleaning up your garage, have three different boxes ready; one for donation, one for throwing away, and one for keeping. In this manner, the things that you have to organize remain organized through out your cleaning process.
Ceiling
As we head inside, let’s begin with the top most part of your house, the ceiling.
Ceilings are a challenge to clean! You have to have height and the right tools to clean it. Here are a few tips to clean your ceiling without hiring professional cleaners to do it. Imagine the amount of money you’re going to save!
Pro tip: Make sure you have coverings for your eyes, nose, and mouth. These dust particles can be annoying to remove and having protective covering will protect you from exposure to your cleaning agents which can be toxic to sensitive skin.
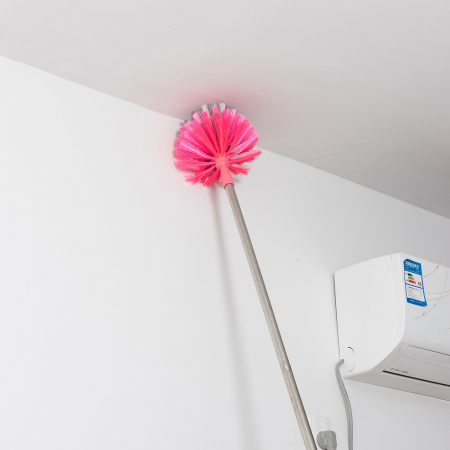
- Remove dust from your ceiling with a long-handled brush.
11. Before anything else, make sure to remove all the dust from your ceiling.
By dusting off your ceiling, it will be so much easier to wipe away your ceiling with a wet cleaning agent.
To make this step easier, you can use a brush or a broom to remove the dust off the ceiling.
12. Place old towels or old shirts on the floor before you start applying your wet cleaning agents.
These old towels and old shirts will be able to absorb all the dirty water coming from the ceiling as you go about cleaning. By doing so, you’re saving yourself from slipping by accident on the water splattered on your floor. On a more practical note, you’ll be able to save time by doing extra clean up of the water splatters spread across your floor.
13. Use a sponge to apply wet cleaning agents.
The sponge is an amazing cleaning tool. Its ability to easily soak up water makes it great to use when working on ceilings because you’re able to apply more product to the area that you are trying to clean.
Make sure that you’re only using gently sponges for cleaning your ceiling because ultra abrasive sponges can ruin the paint job of your ceiling.
14. Use an old toothbrush to clean smaller spaces.
According to dentists, toothbrushes must be replaced every three months to prevent bacterial build up and of course, to ensure that the bristles are always intact to clean your teeth.
While old toothbrushes don’t do great in cleaning your teeth anymore, save them and re-purpose them to use as a cleaning tool. They will work wonders on the nooks and crannies in your ceiling and around your house.
15. If you don’t want to use highly toxic materials in your clean up, use vinegar.
Sure this liquid smells weird and funky, but it is one of the most powerful acids in the world of chemicals.
Acetic acid which is present in all different kinds of vinegar is a potent acid that can help you clean stains off your ceiling. To do this, simply combine a cup of warm water, two parts of liquid detergent, and just two tablespoons of vinegar and off you go!
Spray this liquid detergent and vinegar combination to the surface and use a sponge to wipe it off.
Windows
16. Weather matters. A little cloudy day is a great time to clean out windows.
It may not matter to some people however, weather is a pretty big factor when cleaning out your windows. A summer’s day may seem “ideal” to clean out your windows but it ultimately isn’t. When you clean your windows on a hot and sunny day, that is a surefire formula for your cleaners to dry out against your window with no chance of wiping it off first. That’s like another layer of clean up to do and you haven’t even started. So, weather matters, be sure to clean your windows on a cloudy day instead of a perfectly hot sunny day.
17. Dust off the area you wish to clean.
Dusting off the area before wiping it with wet cleaning agents will harden some of the dust and in turn will make it hard for you to clear. So before you apply any cleansing agents, be sure to dust it off. Just like how you prepped your ceiling for cleaning.
18. Make a glass clearing solution with vinegar!
After prepping the area for cleaning, it’s time to apply a powerful cleaning solution, it’s time for a vinegar wash!
- Add vinegar to your cleaning solution to make it stronger and more potent.
As I’ve mentioned earlier, vinegar is a powerfully potent acid. So, adding it to a mixture of water and liquid detergent makes the solution even stronger.
For tough cleaning you can use two different types of vinegar cleaning solutions:
- Vinegar and liquid detergent wash: Start off cleaning tough glass stains by mixing together vinegar and liquid detergent with water. With this mixture, you are dissolving oily stains from your windows, along with some of the stubborn dirt that didn’t get removed in your dusting.
- Vinegar and water wash: If the stain remains, you can continue with another layer of vinegar wash. This time, you can wash the area with just a mixture of vinegar and water.
With the vinegar rinse, you’ll see some of the streaks fade and get easily wiped away.
19. Use a little bit oil to clear off sticky adhesives and clay from the window.
If you’re surrounded by children, for sure you have encountered stickers and sticky Play-Doh in your window. Some of which just won’t come off so easily and so, to get this job done, you can remove these sticky mess with a little bit of oil. Cooking oil works far better than baby oil, so use that one!
20. Use two different scrubbers or squeegees–one for the outer part of the window and one for the inner part.
Do not use the same scrubber or squeegee that you used to clean the outer part of your window to clean the side that is in your house. If you do so, you’re going to risk bringing in excrement outside right into your home.
21. If you don’t have a squeegee or a microfibre to clear off the water from the glass, you can use newspaper!
Amazingly, using a newspaper will not leave any fibre or lint when you dry off your windows.
22. Always us a fresh scraper if you’re going to clean hard-to-remove materials off your window.
Rusty blades will cause micro-scratches on the glass surface.
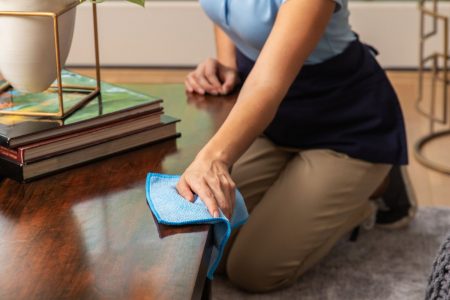
Furniture
23. Know what kind of material your furniture is and use the appropriate cleaning agent.
When cleaning furniture, there is no one size fits all kind of cleaner. One cleaner might work on one type of material and won’t in another. Before purchasing make sure to check the tags to know the proper cleaning approach to use.
24. Wipe upholstered furniture with a soapy mixture of liquid detergent and a sponge.
Don’t let the soapy mixture dry up though! Have a wet and dry microfiber ready to soak up any liquid mixture.
25. Vacuum leather and upholstered furniture weekly to prevent dust build up.
Your sofa is a candidate for dust build up. Not to mention dirt and food crumbs if you have kids and pets.
26. Wipe wooden furniture with delicate cloths, such as a microfiber to prevent scratches.
Once done, make sure to re-oil or re-wax the furniture, depending on its kind of material and the kind of finish.
- Use delicate cloths to wipe dust from furniture made from wood to prevent scratches.
Floor
27. Make your dustpan an actual dust magnet!
Most of the time, your dust pan doesn’t hold the collected dirt as well as it should. It’s a dustpan, its this tool’s job. But, sometimes, plastic makes it really hard for the dustpan to contain the dirt. If you’re moving from one area of the house to another and want to save time going back to the trash bin, you can make the dustpan turn into a dust magnet.
Like we said, a dustpan is often made from “slippery” materials such as plastic or aluminium. To make the dust, hair, and even fur stick to the dustpan, wet the said dustpan a little bit with water and watch in amazement just how much all these dirt stick to the dustpan.
28. Use a rubber glove to wipe hard-to-reach dusty areas.
There’s not a small enough brush to get into the really hard-to-reach areas and to make the hands an even more efficient cleaning tool, you can wear some rubber gloves. The “sticky-ness” of the rubber will make the dust easily attach to it.
29. Smelly vacuum? Time to bring out the detergent crystals!
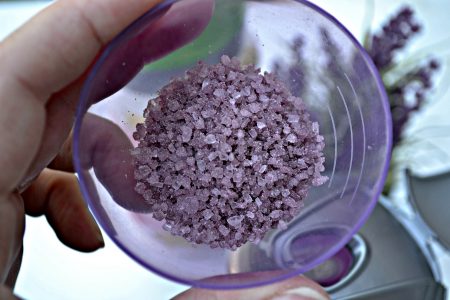
- Laundry crystals will help make your vacuum smelling fresh every time you use it.
Smelly vacuum is honestly one of my worst nightmares when it comes to using a vacuum. It’s almost as if I stepped on moss. Honestly, that’s the exact smell it reminds me of.
If this is one of your challenges, you can take out your detergent crystals and feed it to your vacuum cleaner. Have a great time cleaning with a cleaner & fresher smell each time you use the vacuum.
30. Clear hair from your vacuum.
My wife’s challenge whenever she grew her hair long was that she always experienced hair fall. We’ve found some essential oils for hair growth but, of course, you can’t really stop hair fall from happening. The hair she sheds, though, gets tangled up in the vacuum rollers which makes the cleaning appliance a really inefficient one.
So, before you even start cleaning your whole floor with a cleaner, be sure to remove all the tangled hair from the vacuum cleaner by “trimming” it with a scissors or a cutter.
32. Got carpeted flooring? Sprinkle some baking soda to instantly lift some of the smells.
Baking soda is one of those kitchen ingredients that so many people swear by. Like me and many others, I swear on its power of absorbing smells. It doesn’t only mask the smell the way deodorizers do, it actually absorbs it resulting to a cleaner smell. But what is the explanation behind the magic of baking soda absorbing smells?
According to my research,
33. Re-purpose old socks as a sweeper.
34. Apply some Club Soda on some floor stains to make it go away!
Kitchen
35. Have a grease-free floor with a baking soda and vinegar solution.
Most of the cleaning hacks that I’ve seen on the internet involves the use of baking soda. Being a good researcher, I looked into what makes the baking soda such a magical ingredient against dirt and grime.
According to my research, baking soda is an alkali. Together with an acidic liquid such as a vinegar, it helps dissolve grease, grime, and dirt making it so much easier to remove.
36. Kitchen tiles looking a little grimy? Create a lemon and hydrogen peroxide solution to bring out the grout!
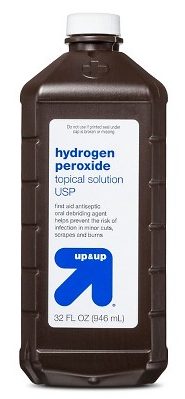
- Have a bottle of hydrogen peroxide for wound treatment and for cleaning up around the house.
Another magical ingredient that’s easily accessible and well, generally not that toxic to skin as the other cleaners is hydrogen peroxide.
Hydrogen peroxide is commonly used to clean wounds because it oxidizes blood, damaged skin, and helps remove bacteria as it goes. This power to oxidize such materials makes it an affordable cleaning agent together with an acid such as lemon juice. With the hydrogen peroxide, those grimes that stick to your tiles will melt away like magic without the toxic fumes.
37. Oily kitchen cabinets? Safely clean them with a hydrogen peroxide and baking soda solution.
For heavier oil residue without damaging a delicate surface such as wood, using the combined forces of hydrogen peroxide and baking soda should do the trick!
To do this, mix the two ingredients until it forms a paste. Using a clean rag, dip it into the mixture and wipe away all the stuck oils and dirt from your kitchen cabinets. It’s as easy as 1, 2, 3!
38. Revive your baking sheets with a hydrogen peroxide and baking soda solution.
Similar to tip number 37, mix the two together until it forms a thick paste. Apply the mixture to the burnt sides of the baking sheets, let it sit, and scrub away. Repeat until the stains are fully removed. Your baking sheets will look as good as new just in time for Thanksgiving Day!
39. Clean your oven with ammonia and dish washing soap.
With holidays coming up and lots of reunions and affairs, your oven will be working hard during this final quarter of the year. Making sure that your oven is clean and well-maintained will ensure that all food gets cooked and yummy to serve to guests. For a cleaner oven, you can use a mixture of ammonia and dish washing soap! Don’t be scared!
Here’s a step-by-step guide to cleaning your oven with a mixture of ammonia and dish washing soap:
Step 1: The first step to successfully cleaning your oven with ammonia is to preheat your oven up to 150 degrees Fahrenheit
Step 2: In an oven-safe bowl or baking pan, put a half cup of ammonia on the top shelf and a bowl of plain water on the lower shelf.
Step 3: Let sit overnight. Allow ammonia to dissolve all the grease and grime in the heat of the oven.
Step 4: Before opening, make sure that there is enough ventilation in the kitchen and make sure that you have some protective covering over your nose and mouth to protect yourself from the fumes. Let it air out before you start scrubbing.
Step 5: Once all the fumes are out, you can remove the dish of ammonia and the bowl of water and set aside.
Step 6: Transfer the water and ammonia into a bucket and add dish washing soap.
Step 7: Using a soft sponge, soak it in the mixture and scrub away all the food, oil, and grime build up. You’ll find that it’s easier to do after the ammonia treatment.
Step 8: Use a clean sponge to remove all the grime away.
40. Dirty cutting boards? Clean it with a lemon slice!
Sometimes, no matter how much scrubbing you do, the cutting board just looks like it’s stuck with dark-colored food stains. This has frustrated me countless of times, but thanks to the power of internet, now I know that scrubbing with a lemon slice is so much better than commercial dish washing soap when cleaning my cutting board.
45. Safely remove nasty fridge smell by keeping pieces of charcoal inside.

- Charcoal is an effective deodorizer because it is porous and made of pure carbon.
This tip has been passed down to me by my parents. I remember how I would often find a piece of charcoal inside our fridge and asked my mother what it was for. She says it keeps the stink away. Moms, being always right, are actually right!
So, why use a charcoal as a fridge deodorizer? The science behind using a charcoal absorb odors can be found in its chemical structure.
A charcoal is pure carbon and is structurally a very porous one. Chemically, charcoal is an organic material that absorbs all organic molecules. This makes it a very effective ingredient in water filters and air purifiers because all the smelly, organic molecules stick to the organic material. Its porous structure helps create a very potent environment for these molecules to stick to.
Put several pieces of charcoal inside your fridge and notice how the smells simply just disappear. Change your charcoal deodorizer every month or longer, until you start noticing the smell again.
You can use the ordinary charcoal or you can buy activated charcoal from the grocery, pet store, or gardening stores.
46. Easily lift stubborn oil and dust from your range hood with boiled water and baking soda.
Your range hood doesn’t only let out smelly air and cooking fumes from your home, it also helps recirculate clean air around you. Since it sits right on top of your stove, it catches oils and creates grimy build up which can be sometimes difficult to remove. It’s a good thing that there’s baking soda!
In a big tub, boil water up to boiling point and add a quarter cup of baking soda into the water. Be careful, this will be hot. While it’s still hot, soak your range hood filter into the tub and let it sit. Wait a while until the solution has done its work and with a brush, gently scrub away all the oily grime build up. Using this simple solution will help ease you of the burden of using so much elbow grease to clean up your range hood filter.
Bonus tip: You can also use this mixture to clean your exhaust fans. Just follow the same procedure and you’ll be cooking with fresher air in no time.
Bathroom
47. Use soda to make your toilet bowls look good as new.
Somebody on the internet said this life hack works so I just had to try it out myself.
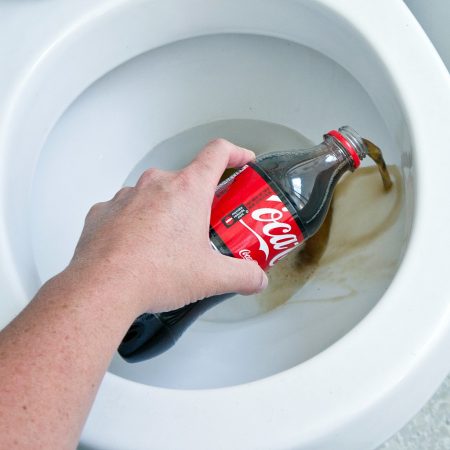
- Using cola against stubborn toilet stains can easily remove it.
For obvious reasons, cola isn’t good for your health. It contains almost your entire allowable sugar content for the day. So, if you’re planning to throw out your cola because you’re trying to follow a healthier diet, know that it works miracles against stubborn toilet stains.
Aside from the amount of sugar it contains, cola is very acidic. This is why it’s bad for the teeth because it breaks down the enamel, it’s bad for the tummy because it will give you a tummy ache, and it’s good for cleaning.
Pour a can of cola around the insides of the toilet bowl, let it sit for at least two hours, and flush away all that stain. If it didn’t come off in one go, I suggest repeating the process, scrubbing a bit, and notice how much easier it is to remove that stain you’ve been trying to remove since moving in to that house.
48. For grimy taps, use vinegar!
Sometimes, the old scrub technique doesn’t work so well with grimy taps. No matter how much effort you put into, it just won’t come off! For situations like this, it’s time to bring out the secret ingredient called, vinegar.
Like cola, vinegar is a highly acidic substance that helps breakdown other substances easier.
To us it against grimy taps, soak a piece of cloth with vinegar, wrap it around the taps, and let it sit for an hour. Let the acetic acid present in the vinegar to dissolve the particles of grime attached to the taps. Happily brush away all that grime!
49. Clean shower heads with denture tablets and vinegar.
Several states have hard water. Hard water causes some build up due on the shower head to the high levels of calcium and magnesium. A simple solution will help you remove all these mineral build up and you’ll only need some denture tablets or vinegar.
In a bowl, dissolve about four denture tablets and water. Soak the shower head overnight and watch how clean your shower head is after this procedure.
If you don’t have denture tablets around your home, you can always use a vinegar solution. Instead of dissolving denture tablets, mix one part of white vinegar in the bowl of water and soak the shower head overnight. For increased efficacy, you can also heat up the vinegar and water mixture for at least 2 minutes in the microwave then soak.
If you have a non-removable shower head, you can just attach a plastic bag containing either mixtures to the shower head and follow accordingly.
50. Remove soap residue from your glass door with a shaving cream.
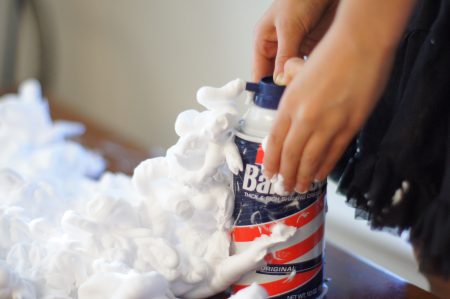
- Remove soap residues and keep your bathroom glass door clean with a shaving cream.
Shaving cream is such a nice thing to have when you’re shaving. It makes the razor glide so smoothly against my face and helps prevent shaving nicks! But, did you know that it can help your bathroom’s glass door remain clean?
After the door has dried, apply some of your shaving cream foam against it and wipe away with a dry cloth. Aside from leaving it clean, it will apply a coating from the cream which will help protect your glass door from attracting soap residue in the future. Oddly enough, a furniture polish can do the same thing too!
We hope that this comprehensive list of tips for a clean home will help you everyday and especially during this holiday season. For more tips and reviews be sure to check back on Topratedanything for the best of ANYTHING on the internet!


8 Comments
I just wanted to say great job on collecting all these tips from all over the internet! It’s very comprehensive… No Marie Kondo can go against your article. loljk. This has got to be my most favorite post on your site right now. I do hope that you keep coming up with really nice articles for your readers. I look up your site whenever I feel like reading something on my phone at work. It helps keep me company.
I’m a landscaper and people hire me to somehow clean up their gardens when it’s almost spring or fall. I help homeowners have their plants get ready for the coming season. One thing I always tell them is how important it is to remove old mulch and replace it with new ones. Plants get nutrients from the mulches and putting a fresh batch somehow refreshes their source of nutrients. You’ll have stronger and more beautiful blooms. Trust me. And also, when you put mulch, there’s very less chance that weeds can grow cos the mulch can serve as barrier from the seeds flying around with the wind. Love your tips, TRA! This is one of the best comprehensive list out there! Instantly shared!
Let me join in this conversation by saying that I swear by using coke and the vinegar! They’re so non-toxic (for me) and it’s important that I only use non-chemical ingredients. I instantly get hives from using soap. This is why I’m very picky with my soap and only buy chemical/alcohol free soaps. This post may be long, but leemme tell ya that you’ve gotta go through the entire length cos there’s new ideas which you will learn from this post. Kudos TRA!
I love that last tip you shared. It’s so nifty I never thought about that and it makes sense! Shaving foams do have some oils which could do the job of coating the glass from retaining any moisture! That was very smart, TRA! Also, I’m very surprised with the hydrogen peroxide tip. I use it for my teeth whitening, it almost acts like a bleaching agent but never thought about it being strong enough to work in cleaning up the kitchen. You indeed learn new things everyday! Thanks for sharing nifty tips, TRA!
Yeah you better clean up your yard especially if you live around forests, who knows what will jump out at you when you’re there with your children. That’s an obvious safety hazard. My neighbor once saw a very small snake in a pile of leaves that he had left out for tomorrow’s collection. Suffice it to say, I never did what he did ever again. I cannot risk my children’s safety. Would be fine if my yard and lawn looked overtrimmed but I will never let my children become unsafe.
your paragraph about charcoal in the fridge, lol, can relate so much! in the philippines, my grandma taught my mom to put the charcoal in the fridge cos it removes the smells inside the fridge. Of course, it worked. It’s the virtue of every grandma’s tips. Are you sure that ammonia is safe inside the oven though? I’m really hesitant about that. Do share your personal experience a little bit more? I would love to hear from you! – Rica
as a stay at home mom, i’ve learned a lot of tricks to cleaning the house and i might say, this list of yours is something I havent come across yet. It’s very informative to say the least. Appreciate your writing on the benefits of hydrogen peroxide when it comes to cleaning. I’m so allergic to most household cleaners and hydrogen peroxide is an excellent alternative if you have very sensitive like mine.
WHAT A JOY TO COME ACROSS YOUR ARTICLE!!! Your list is so helpful and very enlightening. I’ve always wondered how baking soda and hydrogen peroxide will interact. I’ve used them individually but had always been afraid to mix the two together. Now that you mentioned it, it makes sense. I also tried the ammonia tip from your list and that made a HUGE difference in my oven. I’m so glad my kitchen will be instagram worthy by the time all my relatives come for the holidays. Thank you! I better get back at cleaning! =)) THANK YOU FOR YOUR ARTICLE AGAIN!